Introduction to C#; Lesson 2
Introduction to C#; Lesson 1
Alright! lets begin our second lesson. As we learnt about printing in textbox, we decided to continue "printing" but in tools other than textbox, like message box and label. So basically today, we'll be introducing a c# tool known as label.
Label:
Lets give a quick introduction to label first, basically it can be used to
- Display text.
- Display text which can't be edited on run time by user like textbox i.e you can't just type your way to change it, rather you'll be required to take input in (say) textbox and then assigning it to label.

Now lets get to our GUI designing and coding. I'll assume you thoroughly read our first post and know how to open visual studio and drag tools on your form so I'll be just attaching a screenshot of our GUI design and explain it a bit.

So what we did here? We dragged a label and a textbox from toolbox, we changed the text property of our label by typing First Name instead of using its default text label1. So at run time you'll be shown a textbox and a label indicating that, Hey! this textbox requires you to type your first name. This covers our first functionality.
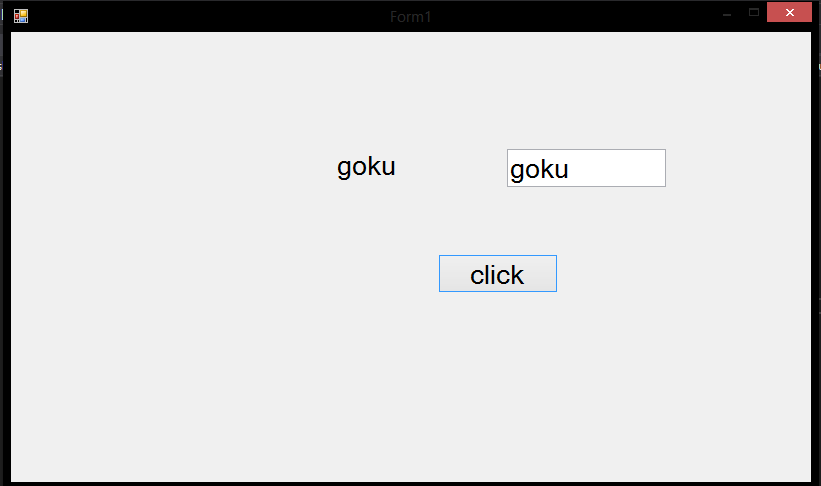
Now lets try to take input from user and showing it in our label at run time, say you are required to display the text your user type in textbox as the text in label when a certain button is pressed, again as button is invoking this functionality, so we'll be coding in our button. Our GUI design, after dragging button, label and textbox will look something like this.

p.s obviously, we've changed our button property of text to show the text of "click", instead of the default text of button1 and we've altered size from font property.
(Tip: You can easily access any tool's property just by single clicking on it.)
Now double click on button and type the following code:
private void button1_Click(object sender, EventArgs e)
{
label1.Text = textBox1.Text;
}
So what we did here? We simply wrote in our code that when button is clicked, the text of our label should change into whatever text is in textbox, and what you know! Our code worked.

At run time, when we added certain name and clicked on button,we observed that our previous text First Name has been replaced by the name we typed in textbox. Now this concludes both of our label's functionality, in our next lesson we'll be discussing about messagebox, specifically how to print/show some message or text in messagebox.
At run time, when we added certain name and clicked on button,we observed that our previous text First Name has been replaced by the name we typed in textbox. Now this concludes both of our label's functionality, in our next lesson we'll be discussing about messagebox, specifically how to print/show some message or text in messagebox.

Comments
Post a Comment